SSH via VS Code

How to work on remote machines while staying in your editor
If you are like me and not a frenetic vi user, chances may be that doing coding on a remote machine without a GUI or anything can be quite a pain sometimes. It is also just cumbersome to write ssh <username>@<hostname> 100 times a day followed by typing your password.
That is why there is an extension for VS Code called Remote SSH that lets you work on remote machines while staying in your familiar IDE environment. Here I will shortly show how to use it.
Step 1: Set up the ssh config file
To avoid typing in the IP or long hostname of your remote machine every time you want to connect, we will create an ssh config file to contain that information. If you do not already have a .ssh directory on your local machine, create one via mkdir ~/.ssh. Since no one else should use the information in this config file beside you, it is recommended to give the directory owner-only permission via chmod 700 ~/.ssh.
We can then set up the config file by typing nano ~/.ssh/config which will open the nano editor. In this file you can specifiy as many remotes as you want with the corresponding information on how to connect with them. An example file could look like this:
# file: "/.ssh/config"
# Host information
Host remote123
  User kieran
  Hostname 130.183.194.13
  IdentityFile ~/.ssh/remote123_rsa
For the config file you need:
- abbreviation for the host (up to you, here remote123)
- the username with which you logon to the remote machine
- the IP address of the remote machine
- the identitify file with the private key (we will deal with this later)
Now we can already shorten our ssh command from ssh <username>@<hostname> to ssh remote123. But there is still room for improvement!
Step 2: Setting up your ssh keypair
In order to avoid retyping our password every time we login, we can use what is called public-private encryption (more on that for example here).
To do this, we first create a keypair on our local machine by typing ssh-keygen into our terminal. As a filename for the pair I will use remote123_rsa (as I specified beforehand in the config file), and when it prompts me to enter a passphrase I just hit Return to avoid having a passphrase, but this is up to you.
Now you should have two files on your local machine: the public key remote123_rsa.pub which can be seen as a lock and the private key remote123_rsa which can be seen as a key. In this kind of encryption, you will give the lock to the remote machine, but do not share the key with anyone. Every time you log into the remote machine, you will basically show it that you can unlock the lock you gave it earlier with your private key, proving that you are allowed to access your account.
For that to work, we have to share the public key with the remote machine. For that, copy your public key to your clipboard via cat remote123_rsa.pub | pbcopy.
Now, log into your remote machine and execute the following series of commands:
mkdir ~/.sshandchmod 700 ~/.sshin case there is no.sshdirectory yet.touch ~/.ssh/authorized_keyschmod 600 ~/.ssh/authorized_keysnano ~/.ssh/authorized_keys
With this, you should now again be in a nano editor opened. Paste your public key in there via Cmd + V, save the file and voilà! We have our key-based authentication set up.
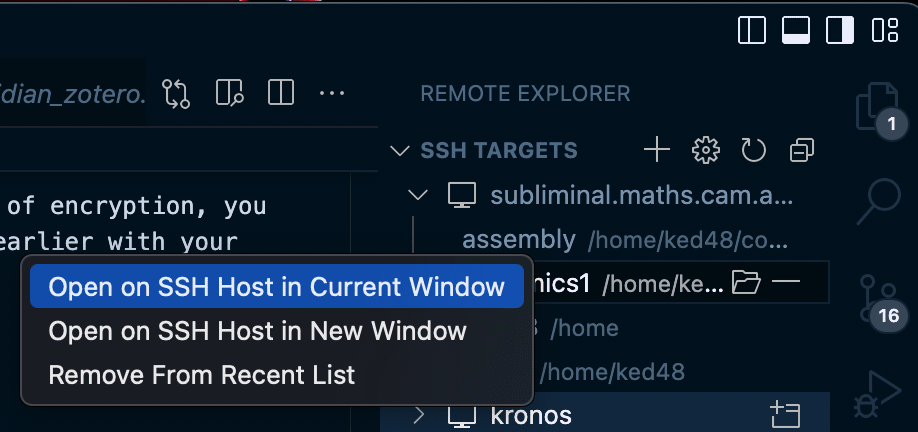
Step 3a: Get it done is VS Code
This last step is actually trivial: You can just open the remote-ssh extension, point the extension towards your ssh config file on your local machine and you’re done! So now you can just open that extension in VS Code, right-click on the host you want to connect and choose Connect; it will open the SSH tunnel and allow you to manipulate files and open terminals in VS Code but on the remote machine.
Once you have this working, VS Code unlocks its powers: you can connect to your remote machine in a few clicks and directly have an integrated terminal at your disposal. Even better, you can just copy files from and to your remote machine just by using drag-and-drop! For me this was a real game changer.
Step 3b: Get it done via the terminal and ssh-agent
In the VSCode case, the extension will take care of handling the private key authentication for you. But if you want to do it via the terminal, you can use the ssh-agent to handle the private key for you.
You can read abou it in more detail here, but it boils down to ssh-agent handling the private key for you; you just have to add it to the agent via ssh-add ~/.ssh/remote123_rsa.
So the process would be:
- Start the ssh-agent via
eval "$(ssh-agent -s)". - Add the private key to the agent via
ssh-add ~/.ssh/remote123_rsa. For safety reasons you can also add a timeout to the key viassh-add -t 1h ~/.ssh/remote123_rsa. - To automatically add the key to the agent when you start your terminal, you can add these lines to your
.bashrcor.zshrc.
You should now be able to connect to your remote machine via just running ssh remote123.
Closing thoughts
Working with remote machines can be daunting if you just heard of how to do it and feel overwhelmed by public/private keys, ssh etc. But once you set it up properly, it actually feels no different to working locally! You have your favourite editor still at hand, can easily switch between local and remote files and start enjoying the power of remote machines. Happy coding!