My MacBook setup for coding and research
About the little gritty details that make the difference in my research workflow
I recently bought a new MacBook and decided to take the opportunity and rethink everything I do on my laptop, from coding over task management to citing papers. The setup I came up with is far from perfect, but for me personally the one I can work very well with. I hope that somebody might find one or two things I mention here useful, and if it is just me next year!
- Getting your shell right
- Data Science workflows: jupyter, pyenv etc
- VS Code: the allrounder
- Productivity Hacks
- Paper and Citation workflow: Zotero and Obsidian
- Closing thoughts
Getting your shell right
I spend quite a lot of the time I spent on my laptop typing commands in the shell, so making this a pleasing experience was one of my main objectives. The standard zsh mac shell is not bad, but you can make quite some improvements over it.
Terminal Emulators: iTerms2 vs Hyper
First of all there are terminal emulators that you can use for a visually more pleasing experience and some cool extra features. The two main tools here are iTerms2 and Hyper. I personally chose iTerms2 since it is more established and more performant in many cases, but will keep a look on Hyper since it looks promising as well (here a comparison between the two).
Making it pretty
With iTerms2 as well as Hyper there are quite some ways to further customize your shell. I personally like this video which helps you make style your shell as well as give it some nice shortcuts (here the summary of the commands used in the video). Here is how my shell looked afterwards:
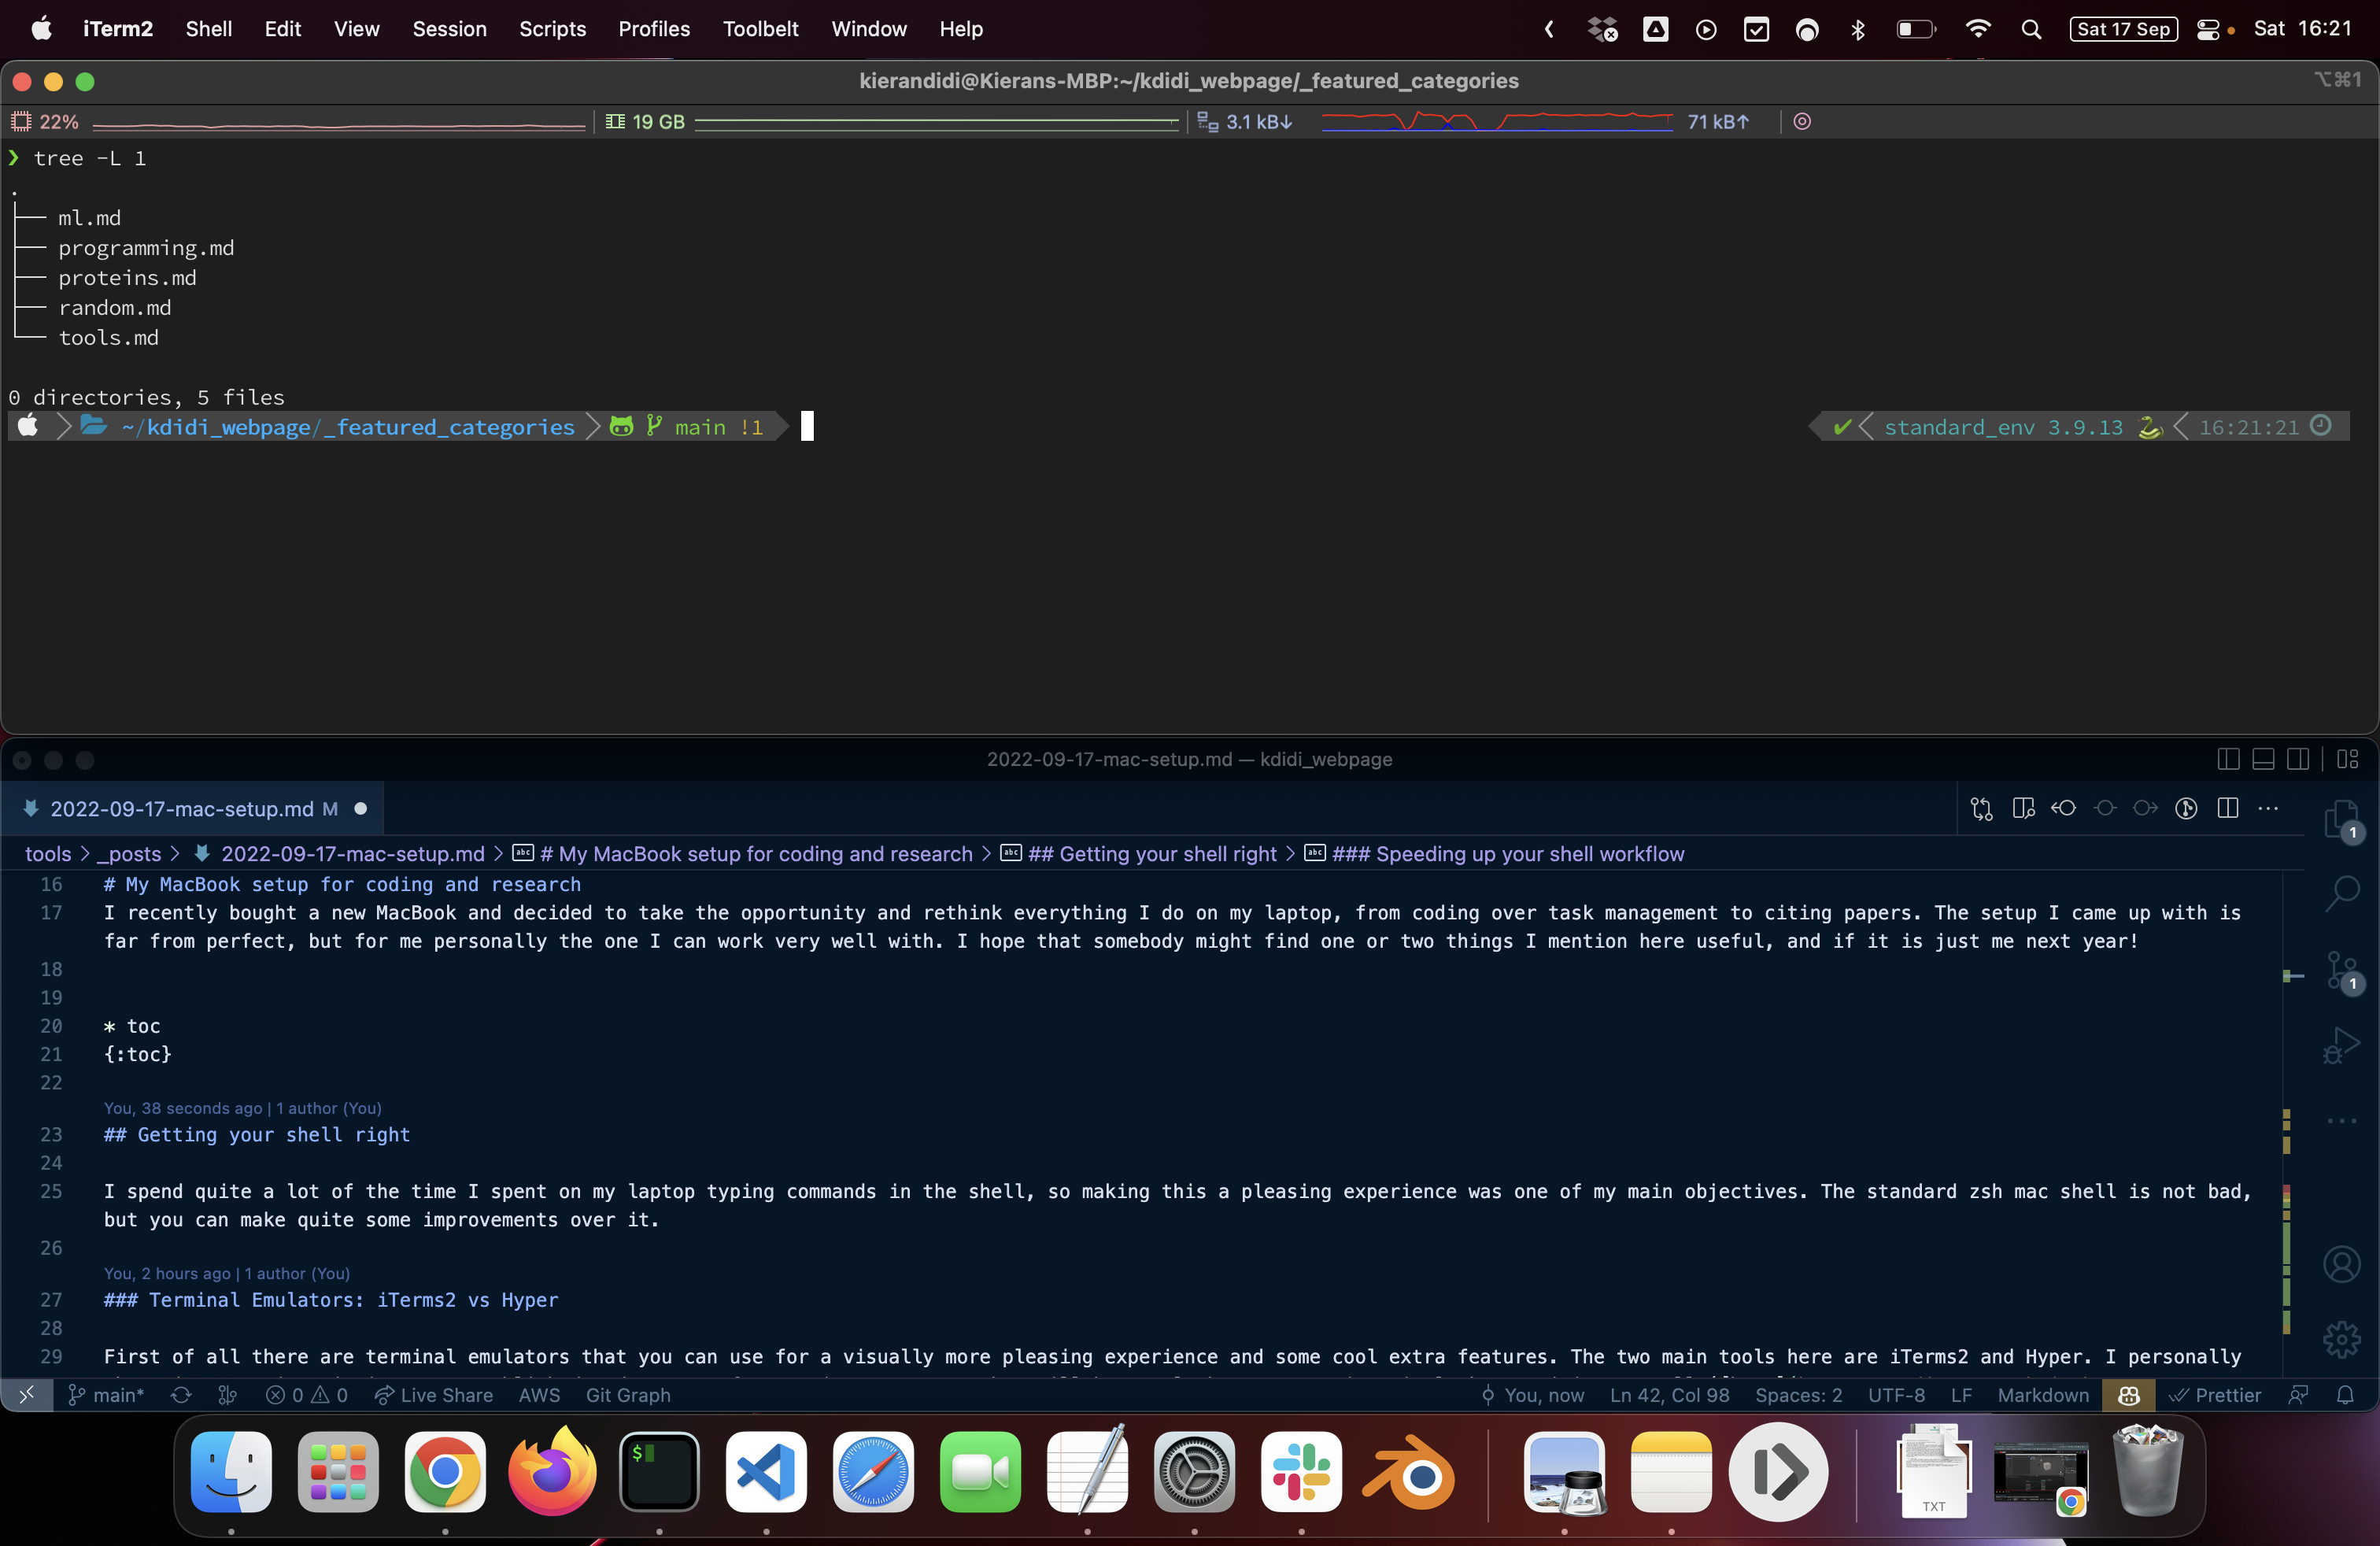
Pretty nice if you ask me!
Speeding up your shell workflow
Navigating the shell is alright, but there are some CLI tools you can use to speed it up:
- tree: shows you the current directory recursively as tree structure (e.g.
via tree -L 1 --dirsfirst, watch out for trashing your terminal with the contents of your whole computer!) - broot: interactively jump directories
Data Science workflows: jupyter, pyenv etc
MacOS comes with a default Python installation, but I try to avoid fiddling around with it since nightmares of clashing package requirements haunt me to this day at night. For managing these varying dependencies, people typically use pyenv or conda. I use both, but prefer pyenv since it is less bloated than conda and has given me less pain in the past. See this post for how to set up pyenv and more!
VS Code: the allrounder
Although the terminal is crucial for coding work, VS Code is my go-to IDE for development work. It is fast, lightweight and offers endless opportunities for customization.
Styling VS Code
I like darker coding setups, so I chose the Night Owl theme by Sarah Drasner . You can get creative with the themes, there is everything from an awful red hotdog theme to win95 throwing you back into computing in the last century. On a more serious note, other dark themes I can recommend are Cobalt and Dracula; for light themes Night Owl Light or Hop Light are popular.
You can install all of these themes as extensions in VS Code and set it to your theme in the settings.
Talking about settings: You can either manipulate your settings via the GUI in Preferences or via the settings.json file which you find under Preferences > Settings > Extensions > Edit in settings.json. Here is mine for reference:
// file: "settings.json"
{
    //styling of theme and font
    "workbench.colorTheme": "Night Owl",
    "terminal.integrated.fontFamily": "'SourceCodePro+Powerline+Awesome Regular'",
    //workspace
    "editor.minimap.enabled": false,
    "workbench.sideBar.location": "right",
    "editor.inlineSuggest.enabled": true,
    "terminal.integrated.tabs.enabled": false,
    //R in VS Code
    "r.rterm.mac": "/Users/kierandidi/.pyenv/versions/3.9.13/envs/standard_env/bin/radian",
    "r.bracketedPaste": true,
    "r.plot.useHttpgd": true,
    "r.rpath.mac": "/usr/local/bin/R",
    //Path Autocomplete settings
    "typescript.suggest.paths": false,
    "javascript.suggest.paths": false,
    "path-intellisense.autoTriggerNextSuggestion": false,
    "path-intellisense.absolutePathToWorkspace": false,
    "sync.gist": "6ba92e3a059eff6eb94ba5b9505d3304",
    "settingsSync.ignoredExtensions": [

    ],
    "extensions.supportUntrustedWorkspaces": {

    }
}
Some of the settings only make sense after the next section about R in VS Code, but some of them are just useful in themselves, for example disabling the minimap (I never used it anyway) and moving the sidebar to the right (preventing your code from jumping around when you open and close the sidebar).
Extensions in VS Code
There is an enormous number of extensions for VS Code out there, so it can be overwhelming sometimes to even start looking into customization. Here I provide a list of the ones I use with a oneliner explaining what they do/what I like about them.
Version Control
- GitLens: shows you inline commit information and a lot more (the premium version is free for students via the GitHub education pack!)
- GitGraph: allows nice visualisation of the commit history, similar to the Network view on GitHub
Cloud Computing
- AWS Toolkit: saves you a couple of visits to the management console if you use it wisely
- Terraform (Anton Kulikov): syntax highlighting for HCL and more
- Docker: again saves you the journey to Docker Desktop
- Remote SSH: connect to remote machine and keep your beloved VS Code IDE (more on that in this post)
Code Quality
- ESLint: if you use JavaScript this extension helps with linting
- prettier: formatted code out of the box
- IntelliCode: helpful autocompletion
- GitHub Copilot: AI-assisted code suggestions (free for students!)
- Autodocstring: gives you a template for docstrings automatically
- ErrorLens: gives useful inline error suggestions
R Development
- R language extension: syntax highlighting etc (more on that in this post)
- R Debugger: allows debugging for R programs
File Handling
- vscode-pdf: easy transformation of code to pdf
- Excel viewer: displays .csv and .tsv files as tables you can easily edit (similar to Excel, hence the name)
- Rainbow CSV: sometimes files are structured as csv/tsv but do not have the file extension; in this case, Rainbow CSV still recognizes that and colors in the different columns to give you a better overview
Others
- SettingsSync: allows syncing your VS Code setup so that you have the same settings on a new device
- Python: the suggested extension bundle for Python including linting and syntax highlighting
- Jupyter the suggested extension bundle for Jupyter notebooks
- liveshare: codevelop with colleagues at the same time (similar to Google Docs)
- PathIntellisense: path completion
For more hacks regarding VS Code, this website and this one provide some nice references and tricks.
Shortcuts in VS Code
Using shortcuts makes your life in VS Code a lot easier. For example, I used to mark the whole line before copying it, but realized at some point that VS Code selects the whole line by default when typing Cmd + C.
So here are some of the common ones I use on MacOS; on Windows you often just have to replace Cmd with Ctrl and Option with Alt.
Workspace
Cmd+B: toggle sidebarCmd+,: open settingsCmd+\: split editor
Navigating
Shift+Option+Up/Down: duplicate line up/downOption+Up/Down: move line up/downShift+Cmd+K: delete whole lineCmd+[: fold current code regionOption+Cmd+[: unfold current code region- create your own regions with #region class method, close via #end regio
Multiple cursors (keep Cmd pressed!)
Shift+Cmd+L: mark every element with same nameCmd+D: go through marked elements one by oneCmd+K: skip one of the marked elementsCmd+Option+Up/Down: add another cursor above/below the current line
Selections
Cmd+Control+Shift+Left/Right: shrink/expand the current selection by a block (defined by VS Code)Shift+Option+Mouse Drag: Select only certain columns and not the whole lines which you hover overShift+Up/Down: Select upper/lower columnShift+Left/Right: Select left/right column
Refactoring
F2for selected element/right-click andrename symbol: refactor cleverly, changes all occurances where variable is referenced (but not for exampled string that is named the same way!)- also works for imports among different files
Finding things
Cmd+F: classic find- click button on search field to include regex in your search
Option+Return: place cursor at all occurences of searchOption+Back: move through filename, e.g. start of extension, start of filename etc. for an image linkCmd+P: open file finder- @ in file finder search: get all matching symbols that were used
- @: in file finder search: getall matching symbold sorted into groups
Productivity Hacks
With all this code editor configurations it is easy to forget that you do other things with your computer as well: writing emails, editing papers, watching videos etc. There are a number of tools that help you get more productive with these tasks, here is my list of tools I use (inspired by this and this post):
- Rectangle: useful shortcuts for window management
- Flux: schedules blue light content of your screen
- Meeting Bar: show upcoming meetings, can be synced with Google Calendar etc
- Dropbox/Google Drive: easily access your documents from the desktop
- Docker Desktop: access your docker images
- ampthetamine: keep laptop session awake if needed (e.g. when running jobs)
- Background Music: volume mixer for MacOS
- Itsycal: show monthly overview in taskbar
- Hidden Bar: customize and sort your taskbar icons
Paper and Citation workflow: Zotero and Obsidian
Back at the start of my study I downloaded papers as PDFs, sorted them in folders and highlighted important bits in my PDF reader. This is (fortunately) a thing of the past: with citation managers such as Zotero, Mendeley or EndNote is it easy to import papers, sort them, annote them and export citations again (for example for use in Latex editors such as Overleaf). I prefer Zotero since it is open-source and offers nice extensions and integrations to other services. One prime example of this is Obsidian, a great notetaking tool in markdown file format. There are many great resources for how to integrate it with Zotero:
- Implement a Zettelkasten for academic workflows
- Academic Writing with Obsidian and Zotero: manuscripts, posters etc
- Bryan Jenk’s YouTube Channel
- Zotero Obsidian Workflow based on Bryan Jenk’s
- Zotero Connector Plugin for Obsidian
- An Academic Workflow, nice guide on how to use colors for highlighting
- Practical guide for the migration
I also published a post on how I use Zotero and Obsidian, so check it out if you are interested!
Closing thoughts
I spent quite some time customizing my setup and at times questioned myself if this time would not be better spent doing actual work. In retrospect, the answer is a clear no: I am way more comfortable with my customized setup, work more productively and just have more fun while doing stuff which is the main thing! Let me know in case you have things that I should add to the post. Thanks for reading!